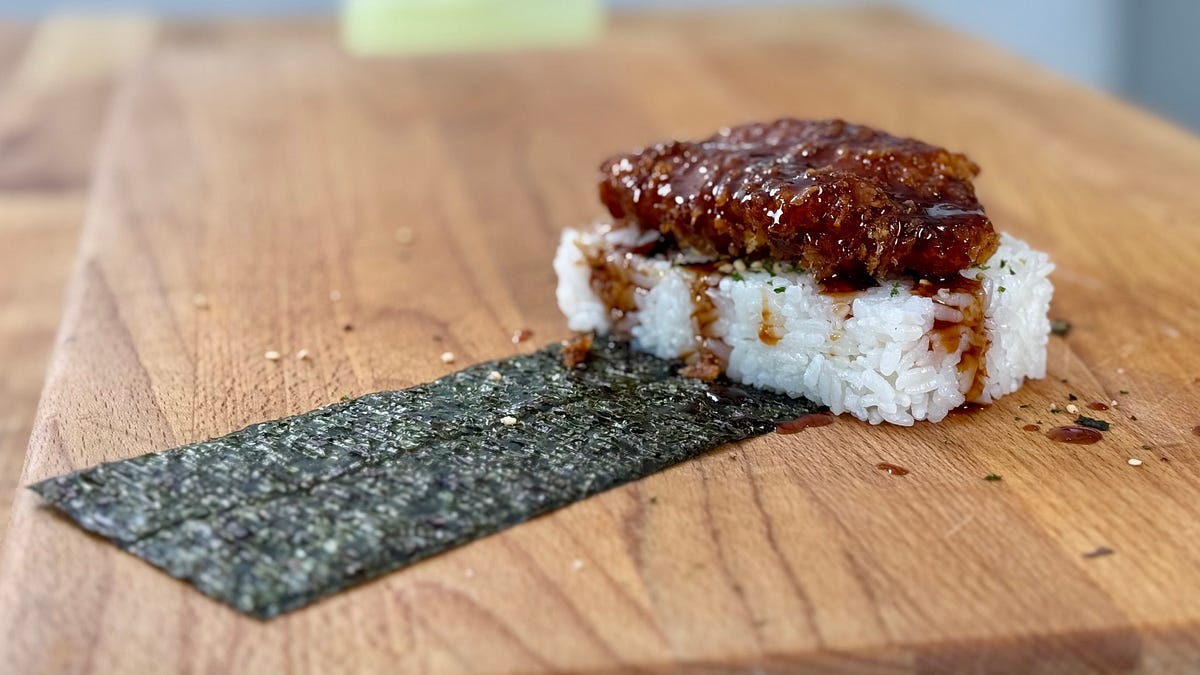
Chicken Katsu Musubi
This recipe first appeared on Not a Chef. SeeMeCook added ingredient weights and nutrition.
Read the original recipeImported by Starr2 on SeeMeCook
A portable, crispy, and emotionally fulfilling snack or meal featuring golden fried chicken thigh cutlets and seasoned rice wrapped in nori.
- Time
- 70 minutes
- Equipment
- Stovetop
- Good for
- Lunch or dinner
- Contains
- Gluten, eggs, soy, fish, and shellfish
Diet and allergen details are read from the ingredient names and are not certified.
Ingredients
Rice
- 415 g
- 600 g
Chicken Katsu
- 300 g
- 125 g
- 100 g
- 120 g
Sauce
- 45 g
- 50 g
- 35 g
- 35 g
- 20 g
- 25 g
Other
- 6 g
Weights are estimates. Together, the ingredients weigh about 1.87 kg before cooking, which is about 310 g per serving.
Steps
Cook the Rice
Add your rice to your rice cooker bowl and rinse it 4-5 times, or until the water runs clear.
Place the bowl back in the cooker, add your water (2 1/2 cups), and press the cook button.
Make the Chicken Katsu
Cut each chicken thigh into 3 equal pieces widthwise (short ways) to avoid making long 'chicken sticks'.
Cover the chicken pieces with Saran Wrap and gently beat them with a heavy-bottomed pot to even out the thickness for even cooking.
Season both sides of each chicken piece with salt and black pepper.
Set up a dredging station with three bowls: the first with lightly salted all-purpose flour, the second with beaten eggs, and the third with panko breadcrumbs.
Dip a piece of chicken into the flour, flipping and tapping to ensure complete and even coverage.
Shake off any excess flour and submerge the chicken in the egg bath, flipping to coat entirely.
Lift the chicken, let excess egg drip off, and place it into the panko; press the panko firmly into the chicken to build a strong coat.
Repeat the dredging process for all remaining pieces of chicken.
Fill a heavy-bottomed pot with about 3 inches of frying oil and heat it to 350°F (180 °C).
Carefully fry the chicken cutlets for 5 to 6 minutes, or until the exterior is golden brown.
Remove the katsu and let it drain on a wire rack; repeat with the remaining chicken.
Make the Sauce
In a small sauce pot or fry pan, combine the shoyu, ketchup, Worcestershire sauce, oyster sauce, hot honey, and brown sugar.
Whisk the sauce over medium-low heat for 5-7 minutes until the sugars are dissolved and the sauce has thickened slightly (or continue reducing to your desired thickness).
Assembling your Musubi
Cut the nori sheets into 3 even strips each and lay one strip rough-side up.
Place a musubi mold at the end of the nori strip closest to you and add 1/2 cup to 3/4 cup of cooked rice.
Using the musubi press, push the rice down firmly and then lift off the mold.
Sprinkle furikake over the rice block.
Place one piece of chicken katsu on top of the rice and brush or drizzle it generously with the prepared sauce.
Spread a small pinch of rice along the far end of the nori strip to act as glue.
Tightly roll the nori around the rice and chicken to complete the musubi.
Notes
To ensure even cooking, do not skip the step of pounding the chicken thighs. Cutting the chicken 'short ways' ensures the pieces fit the musubi mold correctly. If you prefer a thicker glaze, reduce the sauce for a few extra minutes.
Nutrition
These are estimates per serving, worked out from the ingredients.
- Calories
- 619
- Protein
- 25 g
- Carbs
- 97 g
- Fat
- 13 g
- Fiber
- 2 g
Where the calories come from
Keep this recipe
Save it to your SeeMeCook library, add it to your grocery list, and cook it hands-free with each step read aloud.
Open in SeeMeCook